Appearance
Tutorial: create and use a Motion input
This tutorial shows the full Motion input path. You create an Enhanced Input action and add it to a project mapping context. Then, you use the action in Play mode.
At the end, the E key starts a new IA_Interact action. First, you use it in a project character Blueprint. Then, you send it to a small custom Motion component.
Use this tutorial after the Motion character moves in PIE. Otherwise, start with Quick start or Add Motion to a character.
Start from a working character
- If plugin content is hidden, select
Settings > Show Plugin Content. - Find
B_MotionCharacterinMotion > Blueprints. - Duplicate it into
Content/MotionTutorial. - Rename the duplicate
B_MotionTutorialCharacter. - Duplicate
B_MotionGameModeinto the same project folder. - Rename it
B_MotionTutorialGameMode. - Open the duplicated GameMode.
- Set
Default Pawn ClasstoB_MotionTutorialCharacter. - In the test map World Settings, set
GameMode OverridetoB_MotionTutorialGameMode.
The project character copy already adds the Motion input mapping context and uses Motion input. The copy keeps the supplied plugin assets unchanged. It also gives the new action a known functional path.
The supplied character has a functional input setup. Use it as a reference before you add a project action.
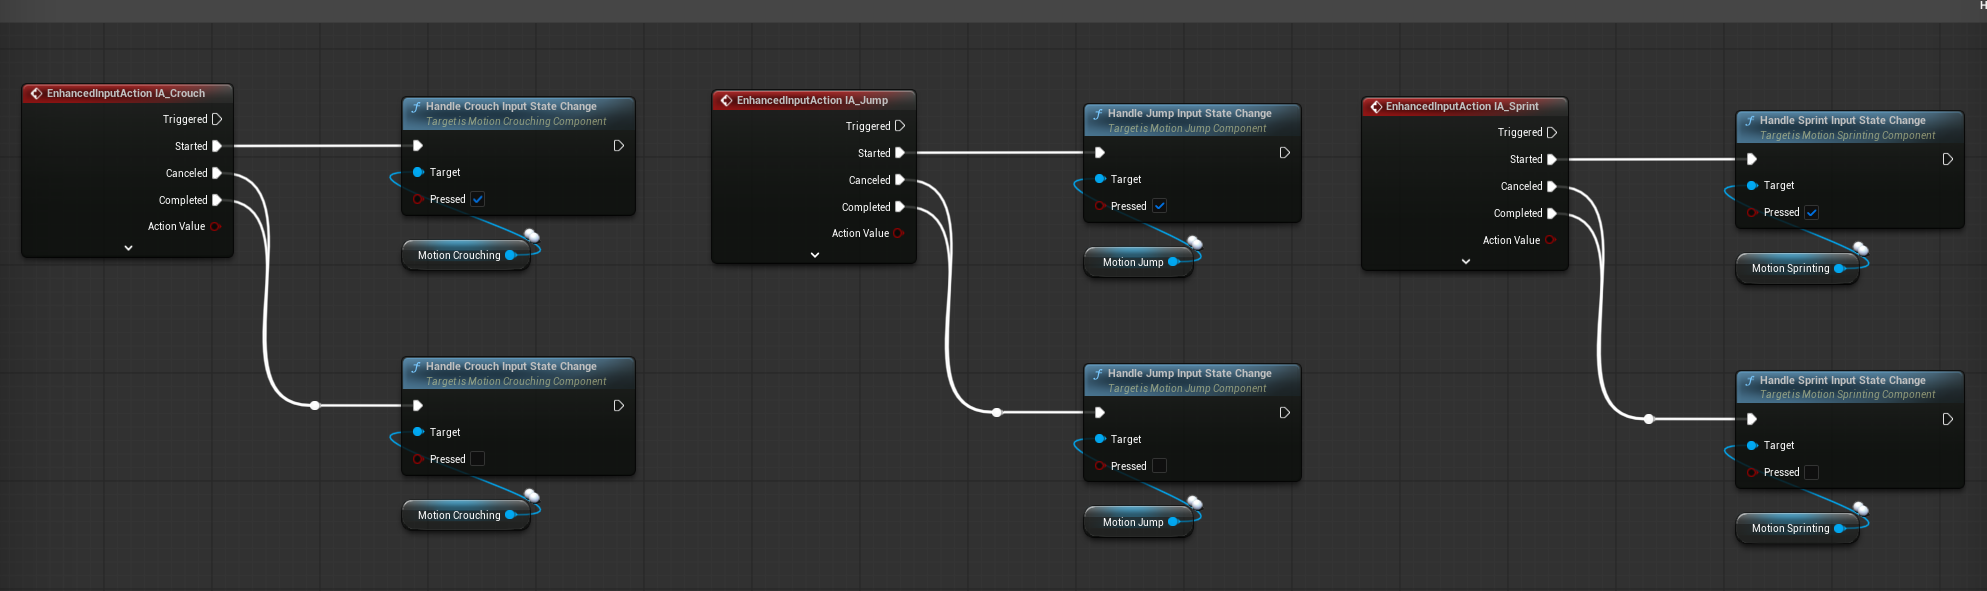
Create an input action
For this lesson, create your own interact action.
- Open the Content Drawer.
- In your project content, create a folder named
MotionTutorial/Input. - In that folder, create an
Input Action. - Name it
IA_Interact. - Open
IA_Interact. - Set
Value TypetoBoolean. - Save the asset.
To change an existing input, open that input action. Keep the value type that the code expects. Sprint, crouch, jump, and interaction actions must stay Boolean. To change only the key, edit the row in the mapping context. Do not create a new input action.
Add the action to the keyboard IMC
Add the action to a project copy of the input mapping context that the demonstration character uses.
- Find
IMC_Motion_KBMinPlugins > MotionCore Content > Motion > Blueprints > Input. - Duplicate it into
Content/MotionTutorial/Input. - Rename the duplicate
IMC_MotionTutorial_KBM. - Open it and add a new mapping row.
- Set the row action to the project
IA_Interact. - Set the key to
E. - Keep triggers and modifiers empty.
- Save
IMC_MotionTutorial_KBM.
Open B_MotionTutorialCharacter. Find the existing Add Mapping Context node in ReceiveControllerChanged. Replace its mapping-context asset with IMC_MotionTutorial_KBM. Compile and save the Blueprint.
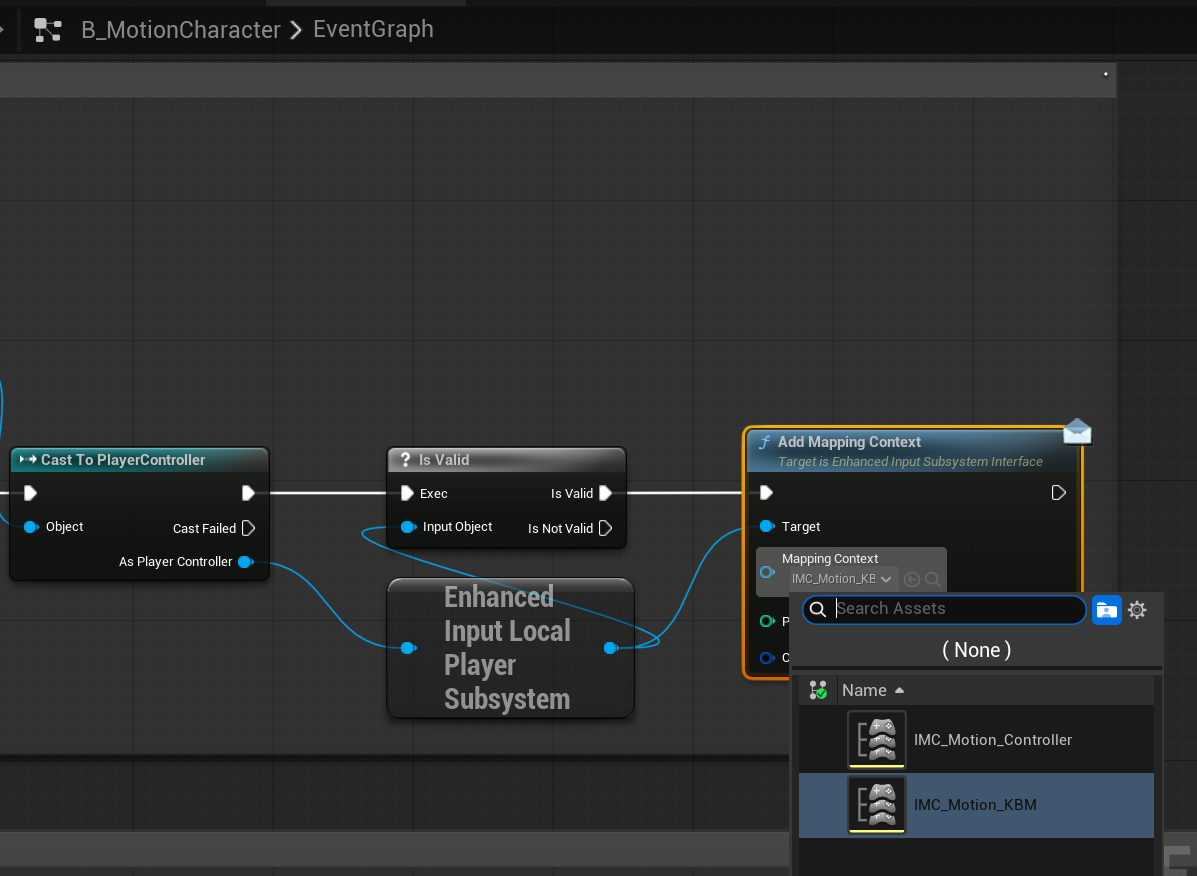
The existing Motion movement actions use the same setup path. If the supplied actions operate in PIE, the new action uses the same mapping context.
Consume the input in the character Blueprint
Use this first path when the action belongs directly to your character or controller.
- Return to
B_MotionTutorialCharacter. - Open the Event Graph.
- Right-click in the graph and find
IA_Interact. - Add the Enhanced Input action event for
IA_Interact. - Use the
Startedexecution pin. - Add a
Print Stringnode. - Set the string to
Interact from B_MotionTutorialCharacter. - Connect
StartedtoPrint String. - Compile and save
B_MotionTutorialCharacter.
Use Started for one-time actions such as interact, fire, inspect, or reload. Triggered can fire repeatedly while an action stays active.
Verify the Blueprint path
- Select Play.
- Push
E. - Make sure that the on-screen message appears one time.
- Stop Play mode.
Make sure that E operates through the mapping context of the character.
Move the input into a custom Motion component
Use this path for behavior in a reusable component. The character continues to own the Enhanced Input binding. Unreal creates its input component during possession. Thus, the input component can be unavailable during actor component BeginPlay.
Create a C++ component named MotionInteractComponent that inherits from UMotionComponentBase.
cpp
// MotionInteractComponent.h
#pragma once

#include "CoreMinimal.h"
#include "MotionCore/Components/MotionComponentBase.h"
#include "MotionInteractComponent.generated.h"

DECLARE_DYNAMIC_MULTICAST_DELEGATE(FMotionInteractInputEvent);

UCLASS(Blueprintable, ClassGroup=(Motion), meta=(BlueprintSpawnableComponent))
class YOURGAME_API UMotionInteractComponent : public UMotionComponentBase
{
	GENERATED_BODY()

public:
	UPROPERTY(BlueprintAssignable, Category = "Motion|Input")
	FMotionInteractInputEvent OnInteractPressed;

	UFUNCTION(BlueprintCallable, Category = "Motion|Input")
	void HandleInteractInput();
};
cpp
// MotionInteractComponent.cpp
#include "MotionInteractComponent.h"

#include "Engine/Engine.h"

void UMotionInteractComponent::HandleInteractInput()
{
	OnInteractPressed.Broadcast();

	if (GEngine)
	{
		GEngine->AddOnScreenDebugMessage(
			-1,
			2.0f,
			FColor::Green,
			TEXT("Interact pressed from MotionInteractComponent"));
	}
}
Replace YOURGAME_API with the API macro of your game module. Add MotionCore to the module dependencies. Then, compile the module. The Blueprint owns the input event. Thus, an EnhancedInput dependency is not necessary for this component.
csharp
PublicDependencyModuleNames.Add("MotionCore");Use the custom component
- Open
B_MotionTutorialCharacter. - Add
MotionInteractComponentto the character. - Drag the component from the Components panel into the Event Graph as a reference.
- Replace the
Print Stringnode after theStartedpin with aHandleInteractInputcall. - Compile and save
B_MotionTutorialCharacter.
The character owns the possession-sensitive input binding. The component owns the reusable behavior. It broadcasts OnInteractPressed for additional Blueprint listeners.
Verify the component path
- Select Play.
- Push
E. - Confirm the component message appears.
- Stop Play mode.
The same input action flows through a reusable Motion component.