Appearance
How to add a first-person item end to end
Use this guide to add one native first-person item to Motion. You will create final PIE visuals from imported meshes and held pose animations.
By the end, you will have:
- a valid
MotionNativeFirstPersonItemConfig - paired first-person and world item presentations
- automatic held pose animations for the movement states you choose
- optional presentation actions for finite item one-shots
- one
Motion First Person Item Upper Body Overlaynode in the host Animation Blueprint - tuned first-person and world transforms saved back to the config
Use a simple item for the first pass, such as a pistol, tablet, scanner, or tool. Add firing, reload, inspect, recoil, inventory, and gameplay rules after the basic item visuals are working.
Examine the character setup
- Open the Motion character Blueprint.
- Make sure that the primary character mesh is the full-body one.
- Make sure that the character has the two named first-person mesh components.
- Make sure that the three body meshes use the same character skeleton.
- Open the skeleton and make sure that
weapon_rexists. - Make sure that the full-body skeleton has
MotionCamerafor the Stable camera / Motion 1.6 camera. - For Socket mode, make sure that the configured pivot socket exists.
- Make sure that the character has
MotionCameraComponentandMotionHeldItemComponent.
The supplied Motion character is the reference layout. It has one full-body mesh, optional first-person meshes, a camera, and a held-item component.
If the first-person body meshes are unavailable, first use How to author optional first-person body meshes and held pose animations.
Create the item asset folder
- Create a folder for the item, such as
Content/Motion/Items/Scanner. - Add subfolders for
Meshes,Animations, andConfigs. - Put first-person assets and world assets near each other so the pair is easy to review.
This guide uses Scanner as the item name. Replace it with your item name as you work.
Import the item meshes
Motion item configs use exactly one presentation pair. Choose static meshes, skeletal meshes, or actor classes / blueprints. Use the same type for the local and world views.
For a static mesh item:
- Import the first-person item mesh as
SM_Scanner_FP. - Import the world item mesh as
SM_Scanner_World. - Open the two meshes and make sure that their origins support attachment to
weapon_r.
For a skeletal mesh item:
- Import the first-person item mesh as
SKM_Scanner_FP. - Import the world item mesh as
SKM_Scanner_World. - Assign the correct item skeleton or imported item skeleton.
- Keep first-person and world meshes as a matching skeletal pair.
For an actor-backed item, create matching first-person and world actor classes. Use this type for a component hierarchy or behavior beyond one mesh.
Do not mix static mesh, skeletal mesh, and actor presentation types. Mixed and partial pairs are rejected.
Import the held pose animations
Import or retarget held pose animations onto the character skeleton used by FirstPersonUpperBody.
Start with these assets:
| Animation | Config field or rule |
|---|---|
Anim_Scanner_HeldPose_Idle | AutomaticHeldPoseSettings.FallbackHeldPoseAnimation |
Anim_Scanner_HeldPose_Crouch | HeldPoseAnimationRules rule with Motion.State.Crouching |
Anim_Scanner_HeldPose_Sprint | HeldPoseAnimationRules rule with Motion.State.Sprinting |
Anim_Scanner_HeldPose_Jump | HeldPoseAnimationRules rule with Motion.State.Jumping |
The fallback can apply to standing, idle, walk, and other standard states. Add a rule only when a state changes the item posture.
Preview each clip on the character skeleton:
- The hands must hold the item consistently.
- The right hand must stay near the specified
weapon_rgrip. - The clip must loop without movement at the boundary.
- The configured solve bones must exist on the held pose animation skeleton.
Create the native item config
- In the item
Configsfolder, create aMotionNativeFirstPersonItemConfigasset. - Name it
DA_NativeFPItem_Scanner. - Open the config.
- Set one presentation pair:
| Presentation type | Fields |
|---|---|
| Static | FirstPersonStaticMesh = SM_Scanner_FP, WorldStaticMesh = SM_Scanner_World |
| Skeletal | FirstPersonSkeletalMesh = SKM_Scanner_FP, WorldSkeletalMesh = SKM_Scanner_World |
| Actor | FirstPersonActorClass = BP_Scanner_FP, WorldActorClass = BP_Scanner_World |
- Leave
OverlayModeset toAutomatic. - Set
AutomaticHeldPoseSettings.FallbackHeldPoseAnimationtoAnim_Scanner_HeldPose_Idle. - Start with
AutomaticHeldPoseSettings.BlendTime = 0.12.
BlendTime controls the blend with the host pose. It also controls crossfades between tag-driven held pose animations for the same equipped item.
Add movement-state held pose rules
- In
AutomaticHeldPoseSettings.HeldPoseAnimationRules, add a crouch rule. - Set
RequiredTagstoMotion.State.Crouching. - Set
BlockedTagstoMotion.State.Walkingwhen this clip is crouch-idle only. - Set
HeldPoseAnimationtoAnim_Scanner_HeldPose_Crouch. - Add a sprint rule with
RequiredTags = Motion.State.Sprinting. - Set its
HeldPoseAnimationtoAnim_Scanner_HeldPose_Sprint. - Add a crouch-walk or jump rule only if the item uses these clips.
Rules match before single-tag entries. Highest Priority wins, then the most specific matching rule, then array order.
Tune the upper-body solve
Keep the default UpperBodySolveSettings for the first pass if the skeleton uses the mannequin-compatible Motion names.
Change these fields only when necessary for the animation skeleton or item grip:
| Field | Use it when |
|---|---|
HeldPoseBranchRootBoneName | The held pose overlay must start from a different branch root |
HeldPoseBranchBlendDepth | The upper-body blend includes too much or too little of the body |
BoneWeights | Pitch distribution must use different bones or weights |
HandIKBones | Your skeleton does not use VB Hand_R, VB Hand_L, hand_r, and hand_l |
PitchSolveAlpha and HandIKAlpha | Pitch or hand correction feels too strong |
Motion validates configured bone names against the held pose animation skeleton. If a configured bone is missing, the automatic overlay fails closed instead of corrupting the pose.
Wire the host Animation Blueprint
- Open the character Animation Blueprint used by the full-body mesh.
- Open Class Settings.
- Make sure that the parent class is
MotionAnimInstance. - Open the AnimGraph.
- Find the final locomotion/body pose before output or final skeletal controls.
- Add one
Motion First Person Item Upper Body Overlaynode. - Route the host pose into
BasePoseon the node. - Route the node output to the final pose or project action layers.
- Compile the Animation Blueprint.
Do not build a manual Sequence Player or Blend Poses by bool branch for the basic held pose. The Motion overlay node reads the active item config, selected held pose animation, blend timing, pitch, and solve settings through MotionAnimInstance.
Activate the item for a test
Use the debug path for the first pass:
- Select the
MotionHeldItemComponenton the character. - Set
DefaultDebugItemConfigtoDA_NativeFPItem_Scanner. - Start PIE.
- Use the project debug held-item input (Default: "T") or call the component toggle path.
For project equipment code, call SetActiveItemConfig with DA_NativeFPItem_Scanner. The component validates the presentation pair first. Then, it updates the item presentation state from the usable config. Overlay and presentation-action validation stay separate.
Tune the first-person transform in PIE
- Start PIE with the scanner equipped.
- Select the character.
- Select the generated
MotionNativeFirstPersonItemTuningcomponent. - Adjust the preview first-person transform. Transform and render tuning edits preview live without saving.
- Adjust the item until its position in the local camera is correct.
- Run
ApplyPreviewToPresentationto apply and save all preview values.
The first-person item attaches to FirstPersonUpperBody.weapon_r. Use FirstPersonRelativeTransform for item-specific grip and screen placement. MotionCameraComponent and its profile control the Stable camera / Motion 1.6 camera. An equipped item does not change camera placement or baseline correction. FirstPersonLowerBody stays grounded.
Tune the world transform
- In PIE, switch to a second player or external view.
- Make sure that the world item attaches to
Mesh.weapon_r. - Use the world transform preview fields on the tuning component.
- Examine the item from the front, side, and rear.
- Run
ApplyPreviewToPresentationto apply and save all preview values.
The world presentation supports remote visibility, shadows, reflections, and third-person readability. Its scale and silhouette can differ from the first-person presentation. It must represent the same item.
Do a test of movement-state presentation
- Equip the item while standing still.
- Make sure that the fallback held pose appears immediately.
- Walk without a special walk rule and make sure that the fallback stays correct.
- Crouch and make sure that the crouch held pose wins.
- Sprint and make sure that the sprint held pose wins.
- If you added a jump entry, jump and make sure that the jump held pose wins.
- Switch quickly between crouch and sprint.
- Make sure that tag-driven changes crossfade during
BlendTime. - Unequip and make sure that the overlay fades to the host pose.
If a state does not change item posture, first make sure that the gameplay tag is active. Use showdebug abilitysystem and Motion animation logs.
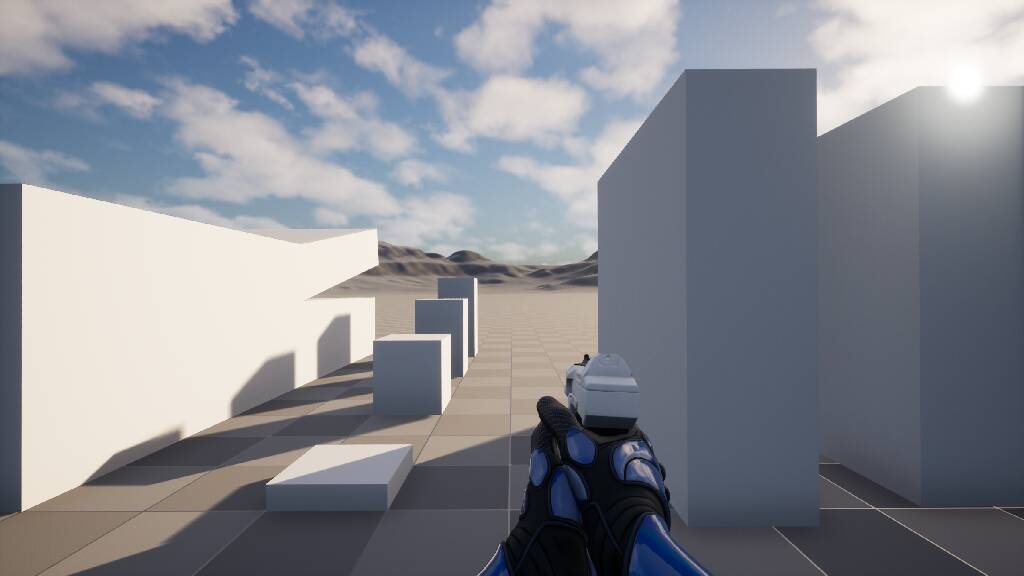
Expected owner-view composition with the item equipped:
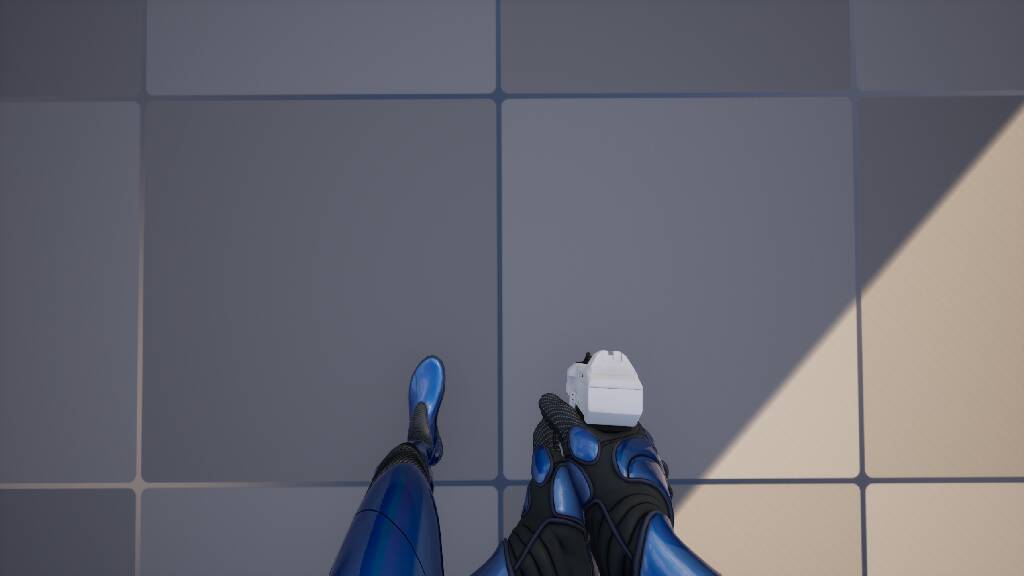
Expected look-down composition keeps the lower body visible without pulling the item into the legs:
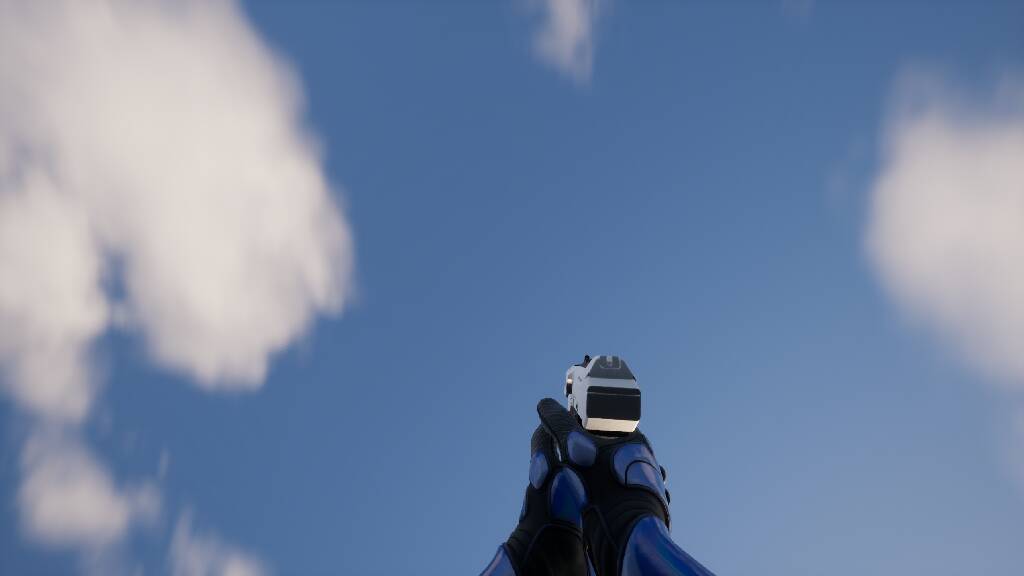
Expected look-up composition keeps the item in a usable owner-view position:
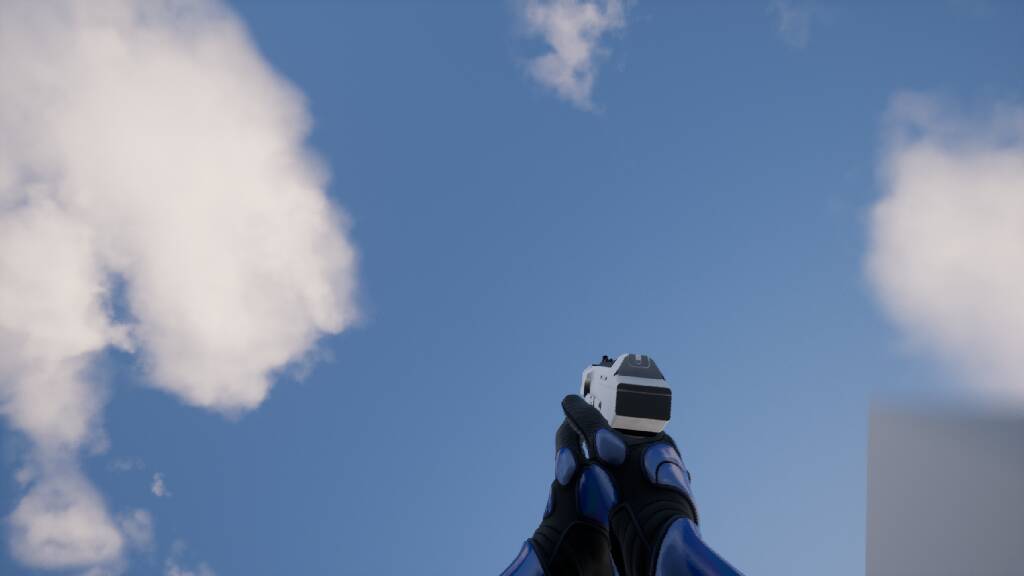
Expected owner-view composition in a walking pose:
Expected unequip cleanup leaves no stale item mesh:

Add optional presentation actions
Use presentation actions only after the basic held pose path works. They are for local visual one-shots on the active item, not for gameplay rules such as inventory, ammo, cooldowns, damage, or networking.
- Import or retarget a finite action sequence such as
Anim_Scanner_InspectorAnim_Scanner_Attack. - Open
DA_NativeFPItem_Scanner. - Add a
PresentationActionsentry. - Set
ActionTagto the tag your Blueprint will request, such as your ownItem.Action.Inspect. - Set
ActionAnimationto the action sequence. - Set
BlendInTime,BlendOutTime, andPlayRate. - From Blueprint, call
RequestHeldItemPresentationActiononMotionHeldItemComponent. - Branch on the immediate result:
Started,StartedAndInterruptedPrevious,Invalid, orUnsupported. - Bind
OnPresentationActionLifecyclefor completion, cancellation, interruption, invalid requests, and unsupported requests.
Motion advances presentation action playback locally. The overlay samples this playback time. Your project controls input, active items, gameplay effects, and replication.
Adjust render values only when necessary
Use RenderTuning after transforms and held pose animation are already working.
- Enable
bOverrideFirstPersonFieldOfViewonly for a different native first-person FOV. - Enable
bOverrideFirstPersonScaleonly for a different native first-person scale. - Do a test of the upper body, lower body, and item together.
UE exposes native first-person FOV and scale through the camera, so Motion applies supported overrides to the whole first-person set.
Add a custom overlay graph only if automatic mode is not enough
Stay in automatic mode for standard held items. Use CustomGraph only when the item replaces all automatic Motion overlay behavior.
Create the custom overlay as a named Animation Layer graph in the item overlay Animation Blueprint. Unreal exposes this graph to Motion at runtime. Do not add a second top-level AnimGraph to the host character Animation Blueprint.
To create a custom overlay graph:
- Create an Animation Blueprint on the same skeleton as the first-person body.
- Open that Animation Blueprint and make sure that the
My Blueprintpanel is visible. - In
My Blueprint, add anAnimation Layer. - Rename the new graph to the exact
CustomOverlaySettings.OverlayLayerGraphNamevalue. - Open the renamed Animation Layer graph.
- Select the graph background to show the graph
Detailspanel. - Use
Inputs>New Input Poseto add one input pose. - Name the input pose
InPose. - Build the extra item pose logic from
InPose. - Do not put another Motion overlay node in this graph.
- Connect the final custom pose to the graph output pose.
- Set the item config
OverlayModetoCustomGraph. - Set
CustomOverlaySettings.OverlayLayerClassto the custom Animation Blueprint class. - Set
CustomOverlaySettings.OverlayLayerGraphNameto the graph name from step 4. - Compile the custom overlay Animation Blueprint.
- Compile the host Animation Blueprint and do a test again.
In CustomGraph mode, InPose is the host pose before the automatic Motion overlay. The layer must provide all applicable pose operations.
For a pure custom held-pose override that keeps the host pose:
- Add a
Sequence Playerfor the item held-pose animation. - Add a
Layered Blend per Bone. - Connect
InPoseto theLayered Blend per BoneBase Pose. - Connect the
Sequence PlayertoBlend Poses 0. - Set
Blend Weights 0to1.0or to the applicable custom alpha. - In
Layer Setup>Branch Filters, add the automatic Motion overlay branch. - Use a different branch only if the item affects different bones.
- Enable
Mesh Space Rotation Blendon theLayered Blend per Bonenode. - Connect the blended pose to the remaining custom logic or the output.
Do not connect a Sequence Player directly to the layer output unless the item intentionally replaces the whole host pose. A direct sequence output ignores InPose, so the first-person body will not inherit the host pose or camera-pitch behavior.
For camera-pitch rotation, add the pitch solve after the held-pose or action blend:
- Read
Get Native First Person Control Rotation Pitchfrom the localMotionAnimInstance. - Multiply that value by the item-specific pitch alpha.
- Convert the blended local pose to component space with
Convert Local To Component Space. - Add one
Transform (Modify) Bonenode per pitch bone. - Set each
Transform (Modify) Bonenode toRotation Mode=Add to ExistingandRotation Space=Component Space. - Set rotation
ZtoPitch * Weightfor the mannequin-compatible Motion setup. - Keep the other rotation axes at
0. - Convert back with
Convert Component To Local Space.
The getter uses the Motion overlay pitch convention. A downward view is positive, and an upward view is negative. On remote pawns, it uses replicated pawn aim rotation.
The default Motion pitch distribution is:
| Bone | Weight |
|---|---|
spine_01 | 0.15 |
spine_02 | 0.10 |
spine_03 | 0.10 |
spine_04 | 0.10 |
spine_05 | 0.10 |
neck_01 | 0.15 |
neck_02 | 0.20 |
head | 0.10 |
If a project skeleton uses a different pitch axis, use the matching axis. If the pose turns opposite the camera, multiply the transform value by -1. Do not invert Get Native First Person Control Rotation Pitch globally. It already uses the Motion overlay convention.
If a layered blend turns the weapon in the wrong direction, examine these items:
- Connect
InPosetoBase Pose. - Connect the held-pose
Sequence PlayertoBlend Poses 0. - Enable
Mesh Space Rotation Blend. - Make sure that the branch filter applies to the specified body area.
- Run pitch transforms after the held-pose blend.
- Use the same skeleton and aim convention for the held-pose animation.
CustomGraph mode does not use automatic held pose resolution or the automatic upper-body solve. It also does not use automatic pose, blend, solve, IK, or action settings.
Validate the finished item
Examine these items before you finish the item:
- The item config has exactly one static mesh, skeletal mesh, or actor presentation pair.
- Automatic mode has a fallback held pose animation.
- Each held pose rule has necessary tags and an animation.
- Each single-tag entry has a valid tag and animation.
- Configured solve bones exist on the held pose animation skeleton.
- Presentation action entries have valid tags, finite clips, and positive play rates.
- The host Animation Blueprint has one Motion overlay node after the locomotion pose.
- The local view shows the first-person upper body and item.
- The downward view shows a continuous connection between the upper-body and lower-body meshes.
- The remote view shows the world item on the full-body mesh.
- Movement tags select the expected held pose assets.
- Equip, unequip, and tag changes blend without stale meshes or linked layers.
- Optional presentation actions end or cancel and return to the active held pose.
What you built
You added one native first-person item through the Motion item path:
MotionNativeFirstPersonItemConfigowns the presentation pair, automatic held pose set, optional presentation actions, solve tuning, transforms, optional linked layer, optional custom graph, and render tuningMotionHeldItemComponentowns runtime presentation, validates the config before applying it, and exposes the optional action request/delegate bridgeMotionAnimInstanceexposes stored item and action state to the AnimGraphMotion First Person Item Upper Body Overlayowns the basic held pose, configured presentation action composition, pitch solve, hand IK, and automatic held pose transitionsMotionCameraComponentowns native first-person render tuning, shared Stable camera clearance, and the shared bounded upper-body/item presentation correction while leavingFirstPersonLowerBodyat its authored transform
Use the same path for the next item, then add item-specific gameplay actions after the presentation is stable.
For API lookup, see MotionHeldItemComponent and First-person item API reference.